Homemade pickle spears are easier than you might think, and they taste incredible. These refrigerator pickles don’t require any canning equipment or special skills—just fresh cucumbers, a simple brine, and a bit of patience.
They’re perfect for summer cookouts, backyard barbecues, or anytime you want that crisp, tangy crunch alongside your burger or sandwich. They’re ready to eat after 24 hours in the fridge and keep for weeks, making them ideal for meal prep or bringing to potlucks and family gatherings.
No time to read the recipe? Pin it to read later ⤵️
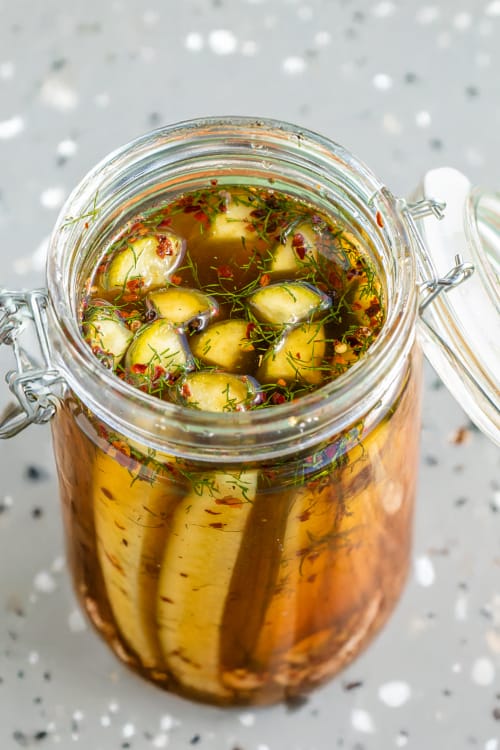
Table of contents
Easy Homemade Pickles Recipe
Making your own pickle spears at home is surprisingly simple, and the flavor is outstanding. I started making these during cucumber season, and now I keep a jar in my fridge year-round. The lengthwise cut creates perfect spears for sandwiches and gives you that satisfying crunch with every bite. T
he fresh dill and garlic infuse into the brine beautifully, giving these pickles that authentic deli flavor. They’re especially great for holiday parties, summer picnics, neighborhood cookouts, or just having on hand when you need something to brighten up your lunch.
What You’ll Need
- Cucumbers – I prefer medium-sized cucumbers that fit nicely in quart jars when sliced lengthwise into spears.
- White Vinegar – This is the backbone of your pickling brine, providing that essential tang and acidity. White distilled vinegar with 5% acidity is standard for pickling because it preserves the cucumbers while delivering clean, sharp flavor.
- Fresh Dill
- Garlic Cloves
- Mixed Peppercorns – A combination of black, white, and pink peppercorns adds complexity and a gentle heat. The different varieties contribute unique flavor notes—black offers earthiness, white brings mild heat, and pink adds subtle sweetness.
- Kosher salt
- Granulated sugar
- Red pepper flakes
- Mustard seeds
- Water
Ingredient Substitutes
Apple Cider Vinegar for White Vinegar – You can substitute apple cider vinegar for white vinegar if you prefer a slightly mellower, fruitier tang. The pickles will have a golden color instead of staying bright green, and the flavor will be noticeably different but still delicious.
Dried Dill for Fresh Dill – If fresh dill isn’t available, use 1 tablespoon of dried dill weed or 2 teaspoons of dill seeds. The flavor won’t be quite as bright and fresh, but you’ll still get that essential pickle flavor.
Honey for Granulated Sugar – Swap the sugar with an equal amount of honey for a more complex sweetness. This creates a slightly more rounded flavor profile and works particularly well if you’re using apple cider vinegar.
Coconut Sugar for Granulated Sugar (Gluten-Free Option) – Coconut sugar provides a gluten-free alternative while adding subtle caramel notes to your brine. The pickles will be slightly darker in color but maintain excellent flavor and texture.
How to Make Pickled Cucumber Spears
Step 1: Prepare the Cucumbers
Start by thoroughly washing your cucumbers under cold running water, even if they’re organic. You want to remove any dirt, bacteria, or residue from the skin since we’re keeping it on for texture and nutrients.
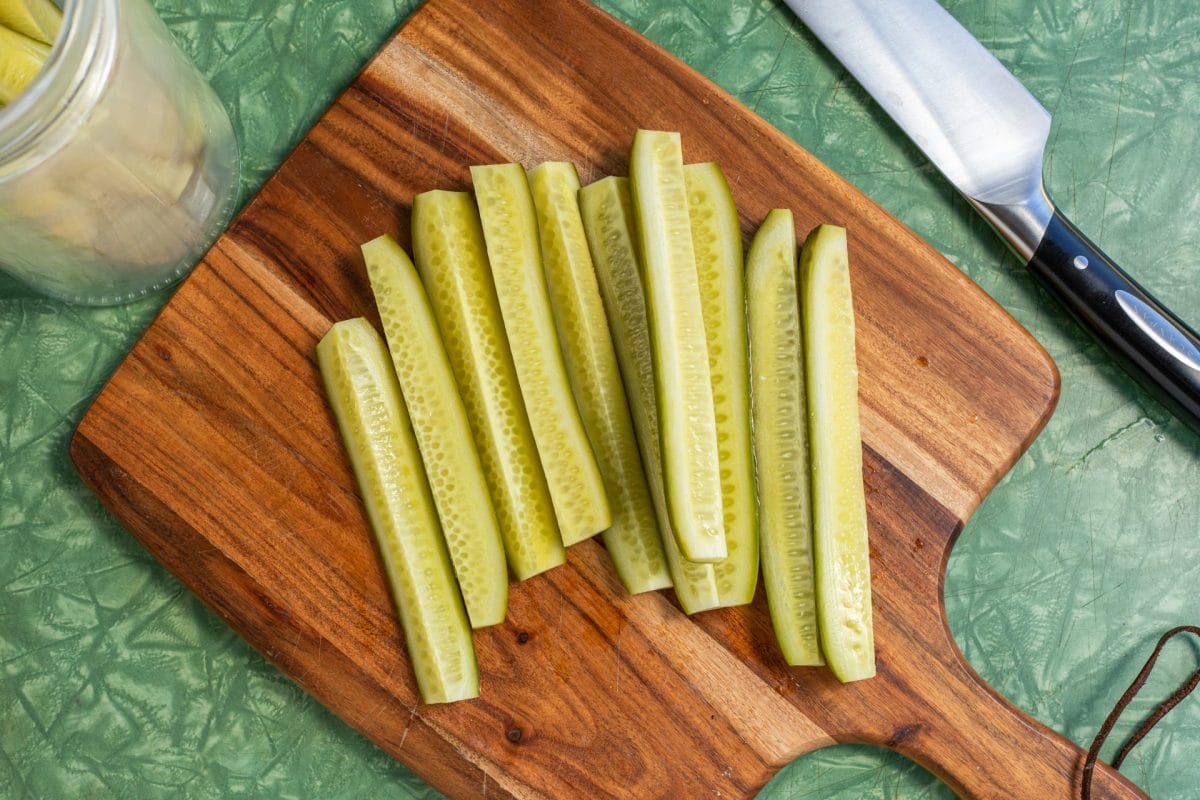
Place each cucumber on your cutting board and slice lengthwise into spears. For medium cucumbers, cut them into quarters by first halving them lengthwise, then cutting each half lengthwise again. For larger cucumbers, you might want to cut them into sixths to keep the spears a manageable size.
The goal is to have uniform spear-shaped pieces that are about the same thickness so they pickle evenly. If you notice any cucumbers with very large seed cavities, you can scoop those out with a spoon, though it’s not necessary for most varieties.
Step 2: Make the Brine
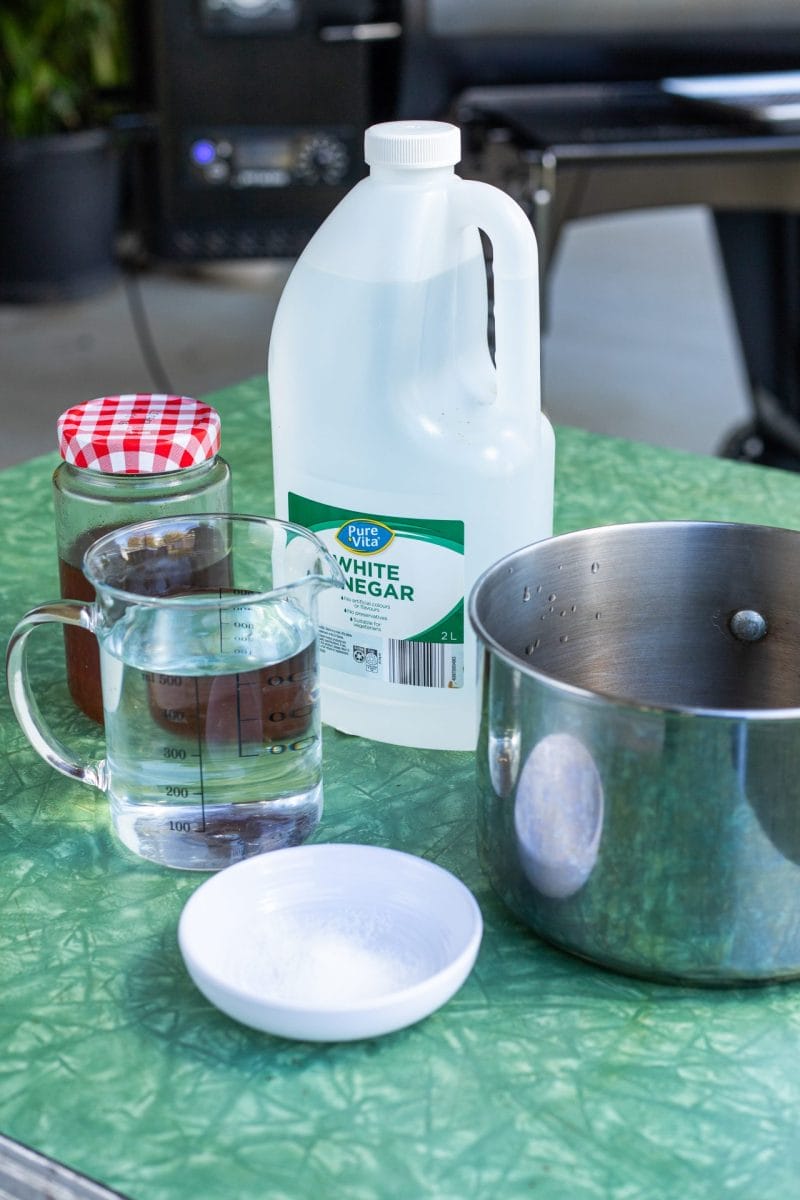
Pour the white vinegar and water into a medium saucepan—I use a 2-quart pot which gives me plenty of room. Add your kosher salt and granulated sugar to the liquid. Don’t worry if it looks like a lot of salt and sugar; this ratio is perfect for creating that classic pickle flavor.
Place the saucepan over medium-high heat and bring the mixture to a rolling boil. Stir occasionally with a wooden spoon or heat-resistant spatula to help the salt and sugar dissolve completely. You’ll know the brine is ready when the liquid is completely clear with no granules visible at the bottom of the pot.
This usually takes about 3-5 minutes. Once it reaches a full boil and everything has dissolved, remove it from the heat. The brine will be very hot, so handle it carefully.
Step 3: Pack the Jars
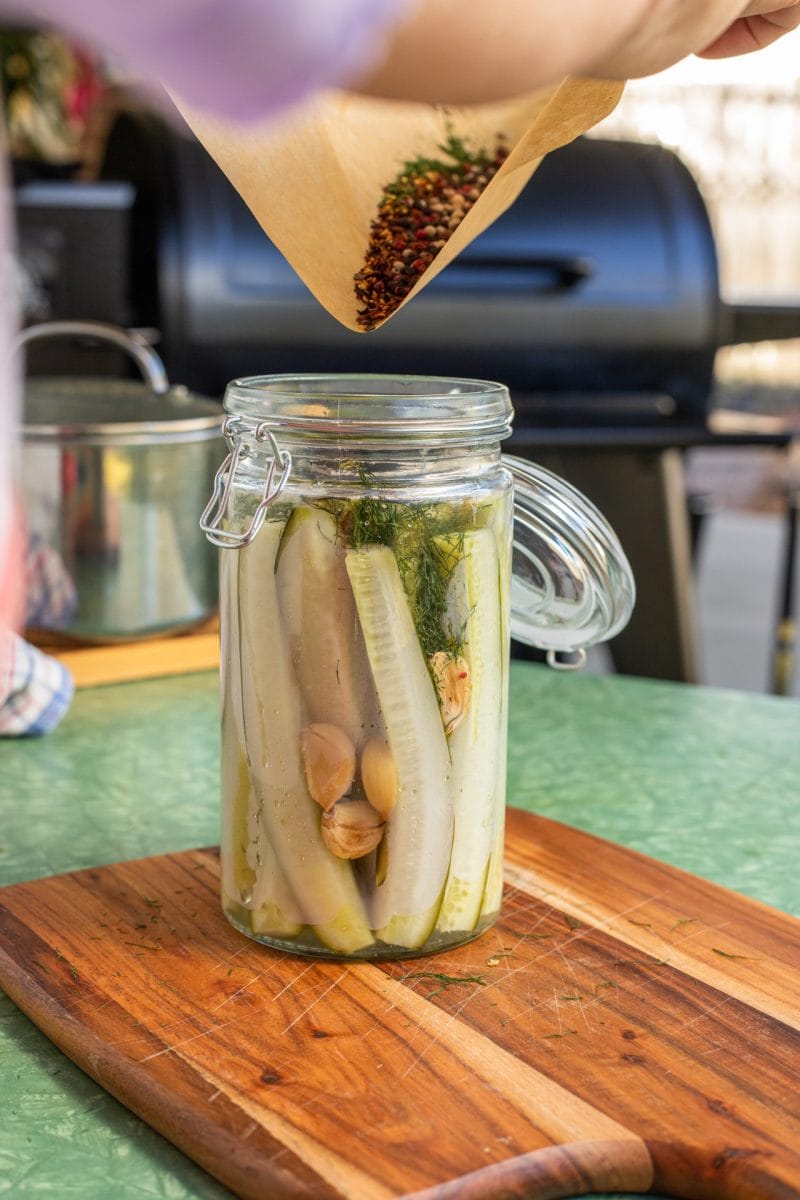
While your brine is heating, start packing your sterilized jars. I recommend using quart-sized mason jars or any glass jars with tight-fitting lids. Standing the cucumber spears vertically in the jars not only looks beautiful but also ensures they all fit nicely and stay submerged in the brine.
Start by placing 2 garlic cloves in each jar at the bottom. Then begin arranging your cucumber spears vertically, fitting them snugly but not crushing them. You want them tight enough that they won’t float but not so packed that the brine can’t circulate. Once your cucumber spears are arranged, tuck fresh dill sprigs around and between the spears.
Sprinkle the peppercorns, red pepper flakes, and mustard seeds over the top—they’ll settle down into the jar when you add the brine.
Step 4: Add the Hot Brine
Carefully ladle or pour the hot brine into each jar over your packed cucumber spears. Pour slowly and aim for the sides of the jar rather than directly onto the cucumbers to prevent splashing. Fill each jar until the liquid comes to within half an inch of the rim—this headspace is important for creating a proper seal when the jar cools.
You might notice the cucumber spears float slightly or air bubbles appear. Gently tap the jar on your counter a few times to release trapped air bubbles, and use a clean chopstick or butter knife to press down any floating spears. Make sure all cucumber pieces are fully submerged in the brine, as any exposed portions won’t pickle properly and could develop bacteria.

Step 5: Seal and Cool
Immediately after filling each jar with hot brine, wipe the rim with a clean, damp cloth to remove any brine, seeds, or spice particles. This ensures a good seal when you close the lid. Place your lid on tightly—you should feel resistance and hear it click into place.
Let the jars sit on your counter at room temperature for about 30-60 minutes until they’re cool enough to handle comfortably. You’ll notice the liquid will appear slightly cloudy as it cools, which is completely normal. The salt and seasonings are still integrating with the vinegar solution.
Step 6: Refrigerate and Wait
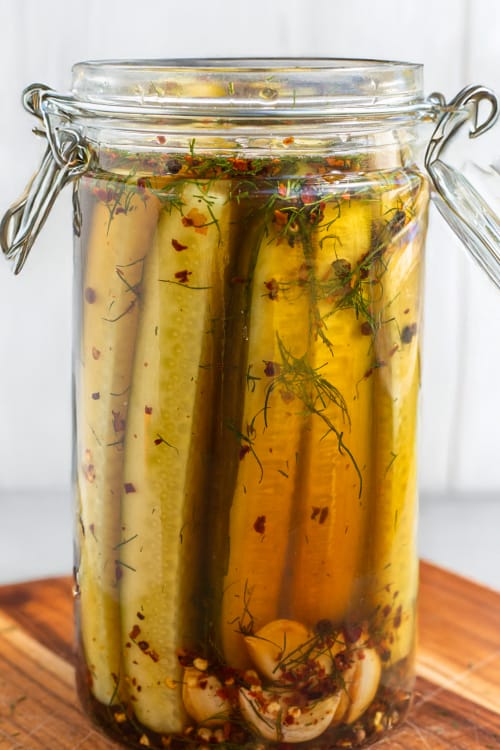
Once your jars have cooled to room temperature, transfer them to the refrigerator. Here’s where patience becomes your best friend. While you could technically eat these pickles after a few hours, they need at least 24 hours to develop their full flavor.
During this time, the cucumber spears will absorb the brine and the spices will infuse throughout. The color will deepen from bright green to a more olive-toned green, and the texture will transform from raw cucumber to that signature pickle crunch.
I know it’s tempting to crack open a jar early, but trust me—waiting the full 24 hours makes all the difference. After that first day, the flavor continues to develop and actually improves over the next week.
How To Store Leftovers and Reheat
These refrigerator pickles don’t require reheating since they’re meant to be enjoyed cold and crisp. After opening a jar, make sure the pickle spears remain submerged in the brine and securely close the lid after each use. Store your pickled cucumber spears in the refrigerator at all times, where they’ll maintain their quality for up to 6 weeks.
The key to extending their shelf life is keeping everything clean. Always use a clean fork or tongs to remove pickle spears from the jar rather than your fingers, which can introduce bacteria.
If you notice any cloudiness in the brine after several weeks, don’t worry—that’s normal. However, if you see any mold, off-putting smells, or sliminess, discard the entire jar. These are refrigerator pickles, not shelf-stable canned pickles, so they must stay cold to remain safe to eat.
📌 Did you try this recipe?
Have you made this delicious recipe and loved it?
I would love it if you took a minute to leave a star rating and review. It is also helpful if you made any substitutions or changes to the recipe to share that; thank you!
📌 Please also pin the image below, then you can find the recipe for the next time you want to cook.

What To Serve Pickled Cucumbers With
🍔 Pulled Pork Sliders
🐖 Smoked Pork Belly Burnt Ends
🍗 Traeger Chicken Wings
🥩 Smoked Brisket on Weber Kettle
🧆 Traeger Smoked Meatballs
🍖 Pit Boss Pulled Pork
🥪 Smoked Cuban Sandwich
🐓 Grilled Chicken Thighs
🧀 BBQ Grilled Cheese
Pickled Cucumbers
Ingredients
- 4 large cucumbers sliced lengthwise into spears
- 4 cloves garlic peeled
- 2 tbsp fresh dill
- 1 tbsp mixed peppercorns
- 1 tsp red pepper flakes
- 1 tsp mustard seeds
For the Brine:
- 2 cups white vinegar
- 2 cups water
- 3 tbsp kosher salt
- 2 tbsp granulated sugar
Instructions
- Wash and slice cucumbers lengthwise into spears (quarters or sixths, depending on their size).
- Combine vinegar, water, salt, and sugar in a medium saucepan over medium-high heat.
- Bring brine to a boil, stirring until salt and sugar dissolve completely.
- Pack cucumber spears vertically into sterilized jars.
- Add garlic cloves, dill, peppercorns, red pepper flakes, and mustard seeds to each jar.
- Pour hot brine over cucumbers, leaving 1/2 inch headspace.
- Seal jars and refrigerate for at least 24 hours before serving.
Smoke On!
Charlie

Author: Charlie Reeves
Hi, I’m Charlie, I have been meat-smoking and grilling for the past 15 years. I have an array of different smokers, thermometers, and have a love for finding the right wood and charcoal combo My favourite recipes are my EXTRA CRISPY smoked pork belly, juicy pulled pork, smoked brisket, duck poppers, and ANY SEAFOOD I grill).
I loves sharing his tips with beginners, helping them navigate the world of smoking. I find it’s not just about cooking; it’s a quest for that perfect smoky flavor.
You will usually find me playing with the kids, perfecting my brisket bark, or sipping beers with boys around the fire. Can’t wait to share all my delicious smoking and grilling recipes with you!
You can read more about me on our About Us page.
Hungry For More?


